Fun Fall Candles - Easy Peasy DIY


Check out this super easy DIY project to spruce up your candles for Fall...  Now that my mantle is decorated, I wanted to bring more Fall color to my kitchen table.  

I started with a hurricane candle trio that I've had for several years.  I am using faux battery operated candles that are made from real wax.  They have a realistic look without the danger of fire.

I used jute twine and faux Fall leaves to bring the look of Fall to these candles.


I put one leaf on each side of my candles (since they will be sitting in the center of my table I wanted a leaf to show from each side).  I held the leaves down while twisting the twine around the center of the candle three times.  Then I tied the twine in a knot centered on one of the leaves.  Last I cut the twine ends so it wasn't hanging too long.


I did the same process on all three of my candles.  Here is what they look like now.  I love how something so simple adds so much color and charm to these beauties!


I placed the glass hurricanes back over them and now they are ready to go.   The glass creates a glare on the photo, but you get the idea.  


I will be able to use these candles throughout the entire Fall season.  I will add pine cones, a few birch branches and more leaves down the center of the table for our Thanksgiving family gathering.  When I do, I will be sure to share more pictures :)

Blessings,
Diana


Linkin up to these fun parties -
Funky Junk Interiors

Fall Mantle Decor


I have a fascination with Fall and all of the amazing colors!  It's  probably because where I live in Southern California we don't see much Fall color.  So when fall finally arrives I love to decorate around the house with Fall colors and beautiful maple leaves. 

I just finished decorating my mantle for this Fall season.  I used a bunch of faux silk maple leaves, mixed with a few pumpkins that I painted, some burlap cloth ribbon and small pine cones.


I got an amazing deal on the burlap.  I got 300 feet of it on a roll for only $9.99.  You can get the same deal on Burlap Ribbon/Cloth Here.


I like the look of Fall on the mantle, but now I am thinking I need to find something different to hang above the mantle.  The colors in this picture don't look right with all of the fall decor.  It definitely needs something more rustic! 


I am thinking maybe an old vintage window or a rustic old frame would look good in place of the picture.  What do you think?  I would love to hear your thoughts!
Until next time,
Diana


Linkin up -
Funky Junk Interiors
Tatertots and Jello
My Uncommon Slice of Suburbia
Fox Hollow Cottage


Pumpkin Painting - Fall Decorating Ideas

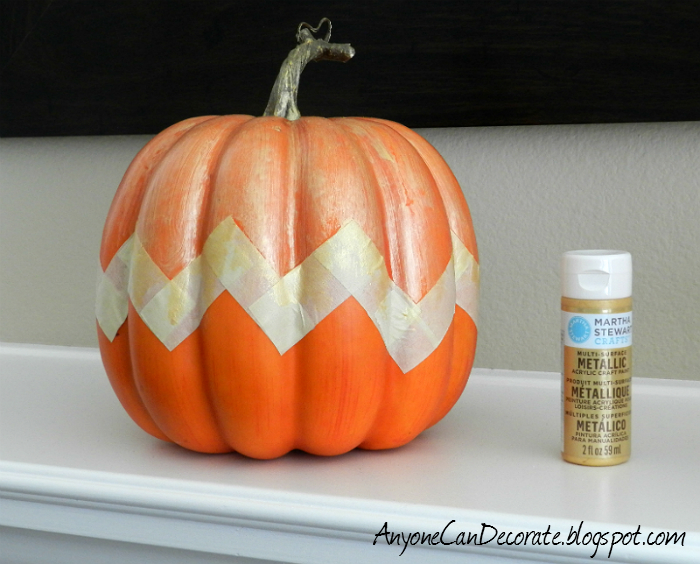
I spent yesterday painting a few pumpkins for my fall mantle.  I purchased some faux pumpkins from my local craft store so I could use them for more than one season.  I love the chevron pattern, but I didn't necessarily want to paint an entire pumpkin chevron, so I taped of the center of this pumpkin with masking tape in a zig zag pattern all the way around.


I painted the top half with Martha Stewart Metallic gold.  I applied the paint with a sponge brush.  The first coat of paint was pretty thin so I opted for a second coat after the first had dried.


After painting the pumpkin with two coats the gold was much more prominent.  


The gold was a bit too yellow for my preference so after removing the tape from the pumpkin I brushed a brown antiquing glaze over the entire surface.  I love the final look.  


I am working on a couple more pumpkins and decorating my mantle for fall.  I will share the finished mantle with you tomorrow...

Until next time...


I am sharing this post at the following parties -


Two Succulent SistersFunky Junk's Sat Nite Special  My Uncommon Slice of Suburbia

One Year Blogiversary & Revisit Very First Post

Today is day 365 since I first started blogging and first started Anyone Can Decorate.  Happy Anniversary or should I say Blogiversary to me and ACD tomorrow... Woohoo!  I can't believe how fast this year has gone...  It seems to have flown by!

I thought it would be fun to revisit my very first blog post from day one of Anyone Can Decorate.  Since I didn't have any followers when I first started, most of you probably have never seen it.  So here it is, I hope you enjoy it :)

Baby Nursery - Under $500 Complete

This entire baby girls room was decorated for less than $500.  The crib and mattress were purchased new. The Bellini dresser/changing table was found at a garage sale for $60, to which I added furniture appliques and re-finished in an antique white.  The rocking chair was found at a vintage shop for $25 (it used to be a neon yellow).  I added the furniture appliques to the rocker then painted and distressed it.  The bedding set and mobile were purchased new from eBay.  The canopy I made with a half round piece of plywood and L-brackets, with sheer fabric and trim simply attached around the edging of the board with a staple gun. The chandelier was designed by me and assembled by my hubby.  The table lamp, wall shelves, bulletin board, wall hooks, wood organizer box and wall cherubs were all old vintage pieces from flea markets and garages sales that I refurbished/painted for the room. It is amazing to see how much can be done on a a limited tight budget.  We started with a completely empty room and when we were finished it looked like we had spent thousands.


The chandelier above is dripping with teardrop crystals and petite pink roses.  I designed it from scratch using a combination of both vintage and new lamp parts.  It is painted with Rustoleum satain spray paint in Heirloom White. My amazing hubby wired this beauty and hung it for me.  We added the ceiling medallion to add to the sweet cottage chic look.  We used silicone dipped light bulbs for a soft glow. The floral pillow on the rocking chair is from Target, from Rachel Ashwell's Shabby Chic line.  We later added a soft sage green, cream and rose colored area rug to the floor in front of the crib.
  
The bulletin memo board was made from a vintage frame, painted with the same Heirloom White spray paint, and has distressed edging.  I used a pretty pink floral girly fabric and lace ribbon in a criss crossing pattern across the front. This was an easy DIY project.  I had my hubby cut a piece of fiber board the size of the inner frame..  I added a layer of batting, wrapped the fabric around it and used a staple gun to fasten everything to the rear of the board.


Sweet Dreams Baby Girl !!!


So there you have it.  My first post as written 365 days ago.  The blogging community has been so supportive and loving.  Thank you all very much!  I have enjoyed getting to know many of you and I look forward to seeing what this next year brings.

Blessings,
Diana

Amazing Burlap Deal - 300 Feet - Under $10

This is one of the best deals I have ever found (and I am a major bargain shopper)!!!  Most of us that love to do DIY crafts and projects love burlap!  I was looking for burlap ribbon or garland for a few decorating projects that I want to do with my fall decorations.  The burlap garland at the craft stores was pretty expensive for the short lengths that they sell it in.  I usually found 10 yard (30 foot) rolls and it ran from $7 to $12.  

Then I found this 300 foot roll for only $9.99. Yes, 100 full yards of 4" wide burlap for under $10.  It bought it online and even with the shipping cost for the large roll the total was still under $20.  When I found 300 feet of burlap for this price, I immediately ordered it.   
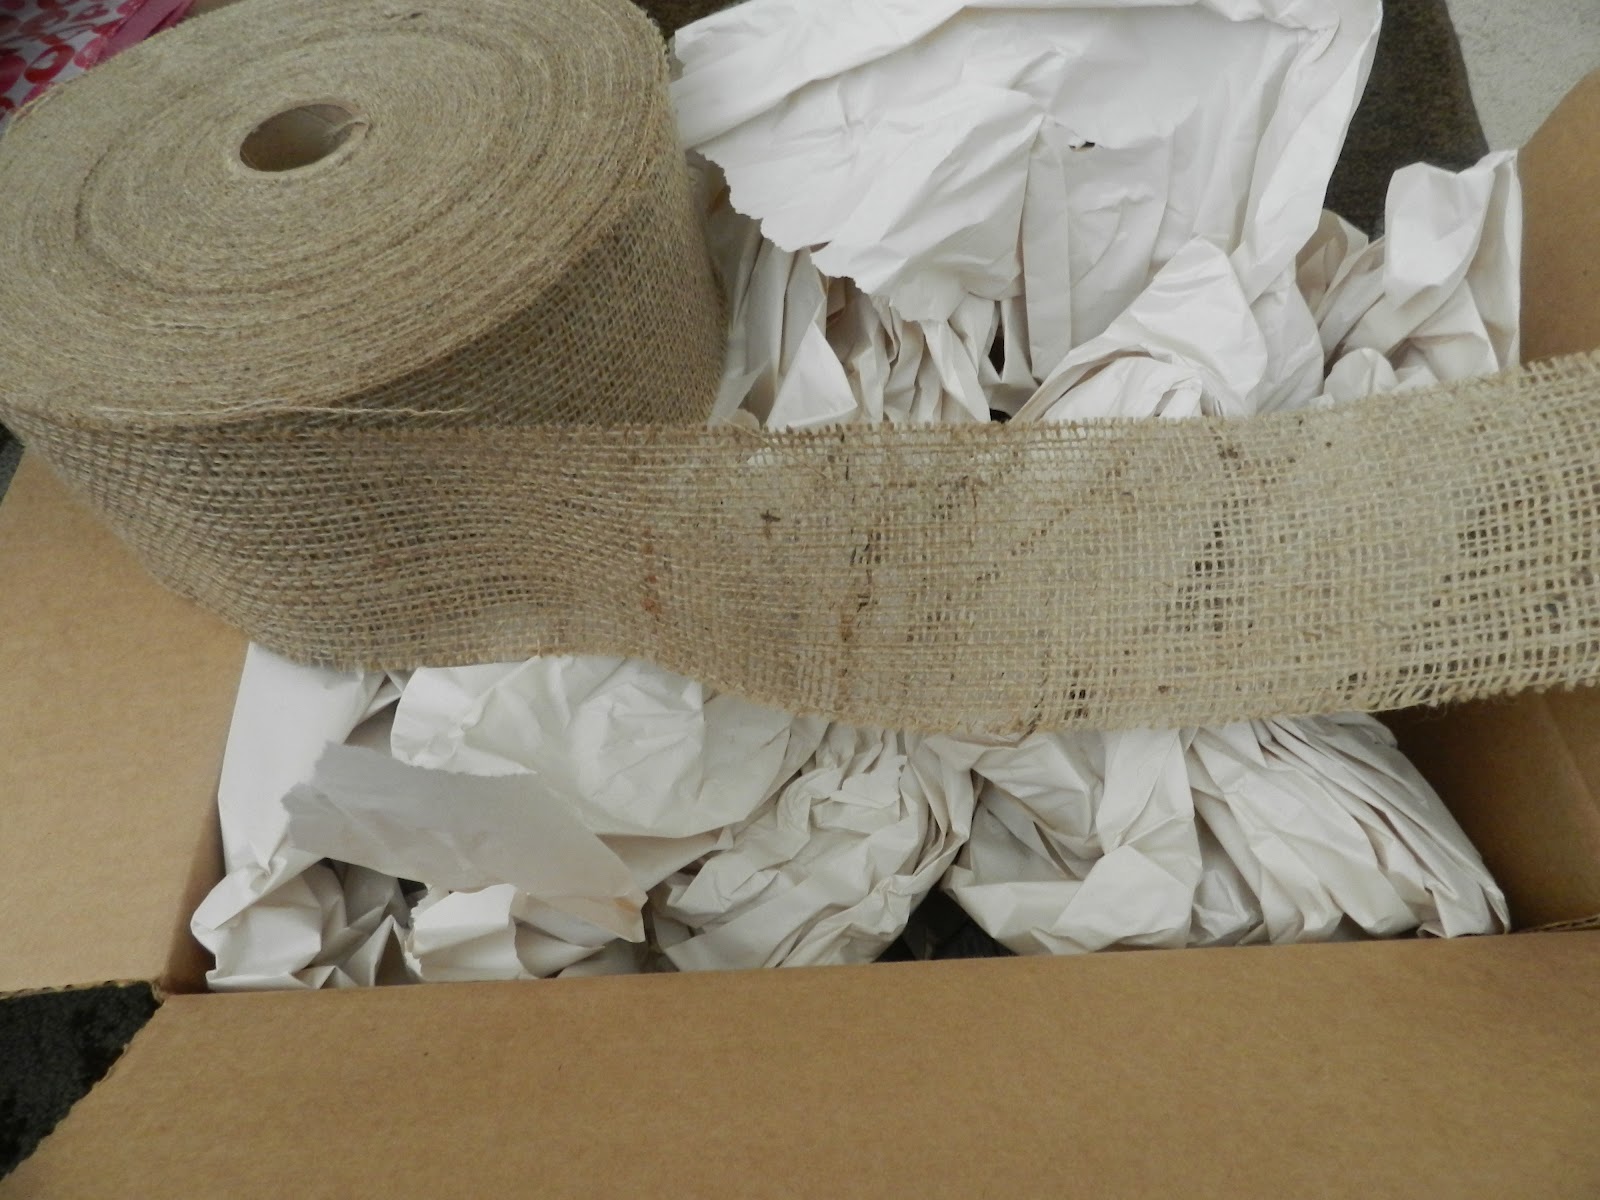
I received my burlap in the mail and I'm so excited about it I so I wanted to share it with all of you.  Look how huge this roll is.  It does not have sewn edges like some of the fancy burlap ribbons do, but this works perfectly for my crafts!!!

I can't wait to stencil some, make garlands from some, decorate my mantle with it, and probably even my Christmas tree this year.  With 300 feet I will be able to make so many fun and creative things!

I was going to wait to share this with you until I got some of the crafts completed, but then I realized that some of you may want to order some for your fall crafts too.  So here is a link where you can get your Amazing Burlap Deal - HERE

Until next time,
Happy decorating!