Glamping Revisited and Some Exciting News!!!


My most popular blog posts have always been my DIY GLAMPING trips. Although I haven't blogged in awhile, I wanted to revisit my first Glamping trip and also share some fun news!

I am happy to share that last year we purchased a vintage tent trailer. I am in the process of giving it a "makeover" and am about 85% complete at this time. We have planned three camping/glamping trips for this Summer (2018). I can't wait to finish this fun project, go camping and photograph it for you all to see. I will share it on the blog later this summer! 

Happy Glamping!


Below is a revisit of our first DIY Glamping Trip...


When you think of camping, do you think it's messy, dirty, uncomfortable, full of bugs and lacks any kind of luxury? Many women I know don't care to go camping unless they are in a nice motor-home or RV and most would probably rather just go to a hotel or resort. A couple of years ago I set out to show that camping can be very nice, in fact this trip was the opposite of most peoples impressions of camping is!!!   Welcome to our DIY camping/GLAMPING trip...


Loving decorating as much as I do, I can't just go camping, so a couple of years ago I decided to start going GLAMPING... which translates to Glamorous Camping For me "Glamping" means having all the comforts of home all around us and decorating our surrounding space with a comfortable homelike feel.  

My Glamping must haves include a comfy bed with nice linens... also, both a shower and a flushing toilet within a couple minutes walk and restaurants in the area so we didn't have to do all of our own cooking or dishes... oh, and lots and lots of candles!!!

Above is a picture of our car at our camp site after we had already started unloading it's contents.  I had it packed literally from top to bottom.  Seriously, I could not have fit anything else inside!!!  I had so much packed and puzzled in every nook and cranny of our vehicle.  Luckily my hubby never complained and is fully supportive of all my decorating craziness :)

I will post several pictures so you can get a feel for what it was like actually being there. If you like what you see, I would love it if you could PIN them to Pinterest and share them with your friends!
  

A few minutes after we arrived at our campsite, my hubby scouted the campsite for a good flat spot and he got to putting up our tent.  Below is a picture of the tent about 25 minutes later.  

I realize that many people don't like tent camping, but as long as you have air mattresses or an airbed it really can be very comfortable!  Air mattresses are very easy to use and roll up small for easy transport. To see what kind I use visit HERE.


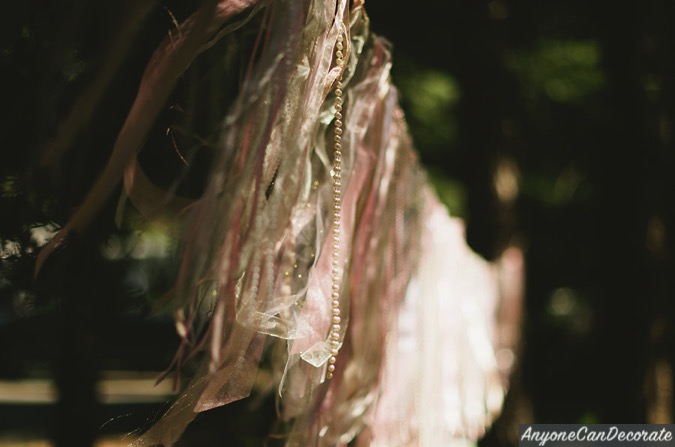
I had planned to hang mason and jelly jars from the trees with candles in them.  I used battery operated flicker candles since there were fire rules in the forest.  As you can see below all of my jars have wire hangars on them so I could hang the jars from the trees.  However, when we arrived I discovered that all of the trees were like 100 feet tall or more and I had absolutely no way to get them up into the trees, so instead I put them all over our site at different levels to add ambiance.  My husband actually went and found a tree laying on it's side in the forest and cut these stumps for me to use as tables.  He also cut us our own firewood... (I'm married to such a stud... lucky me!).

The wooden box below is an old grenade crate with rope handles that I found at a flea market for only $3.  I've since seen them for sale on ETSY and eBay for anywhere from $50 to $150... I so love finding bargains for just a few dollars!  I used the crate to transport all of my hanging mason jars and then was able to use it as a decorative piece at the camp site... love it!


This wall hanging birdcage was found at a thrift store for $3.  I painted it, added some nesting material, hung a few sparkling crystal prisms from it and popped in a couple of battery operated tea-light candles into it.  Since we were outdoors, I incorporated a few birdcages and birdhouses into the decor.


The weather was perfect and the view from our windows was stunning!


Having a bed off of the floor and having end tables when camping made it feel so much more like home!  And it's a ton more comfortable!!!  The wood end table on the left I found on clearance at Home Depot for just $11.  It folds completely flat which made for easy transport.  The little round table on the right I found at a vintage store.  It was originally black, but I painted it white for that shabby cottage chic look.

I made this battery operated chandelier from a birdcage that I found for $10 at Marshalls, a strand of LED Lights, some nesting material and a couple of faux candles that were also battery operated.  I used a bunch of crystal prisms (leftover from prior crafts) add hung them from the bottom making it feel like a real chandelier.  The chandelier added a nice touch of romance to our tent. 


Once we zipped up the windows we had complete privacy.


The entire campsite decor was initially inspired by this vintage wooden Pepsi box crate that I found at a flea market a few weeks ago.  I paid just $5 for it, and with it I was inspired to go with a red, white and blue theme.  Also being that 4th of July/Independence Day was close, I figured patriotic colors were appropriate.


Below is a wooden box that I added rose furniture appliques to and then I painted it Heirloom White and distressed it for a shabby look.  I added mason jars to it to and used them to hold our designer plastic silverware (hehe)...


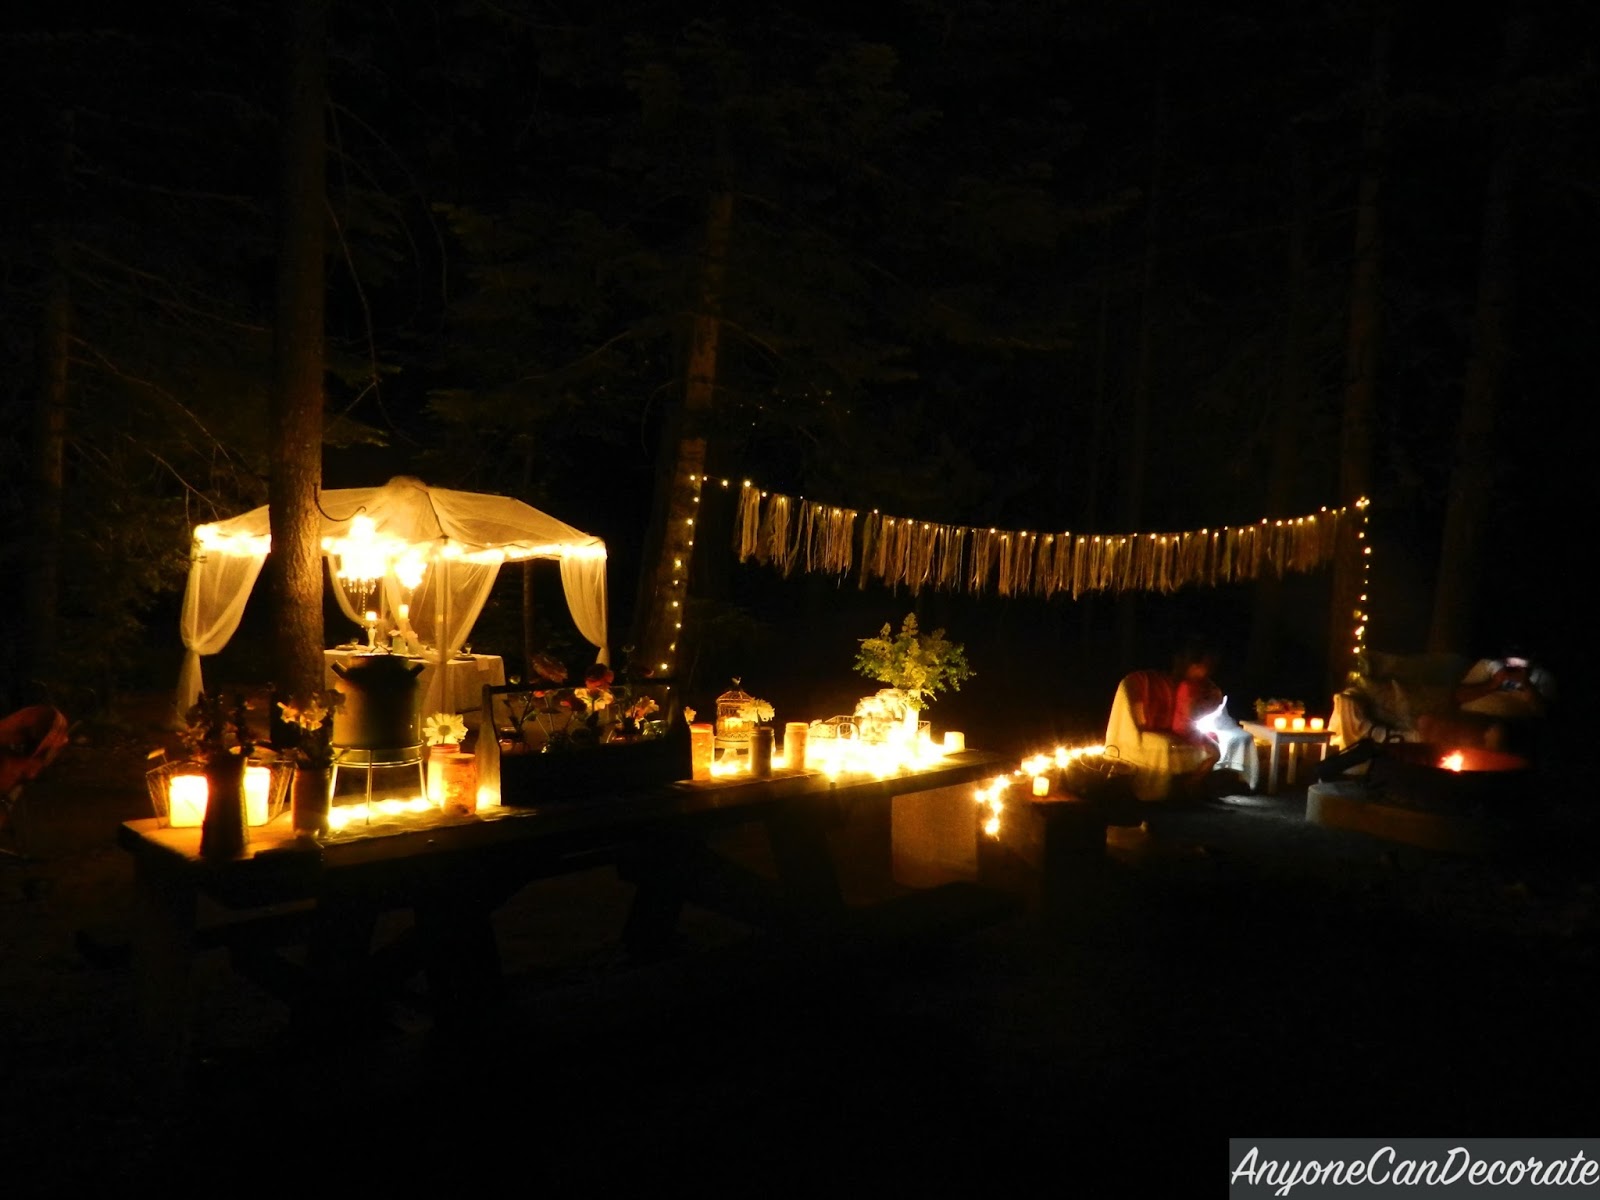
I loved lighting the candles and chandelier as the sun went down. It added a warm glow and soft ambiance to our campsite. We were out in the forest with hundreds of huge trees and we had created our own wonderful romantic haven... It was our home for the weekend. 

My parents stopped in for a visit and my father said, "Wow, so you can be homeless and still live in style". He got a huge kick out of the fact that I would go to all this trouble... but he loved it!


The framed chalkboard on the table that says "welcome glampers" was made from a vintage frame I found for just $2 at a swap meet.  I spray painted the frame Heirloom White and then painted a wood backer board (that fit inside the frame) with Rust-Oleum Chalkboard paint

I love making my own chalkboards from inexpensive vintage finds!


As I mentioned earlier, I gave the chandelier light by using Battery Operated LED Lights. They put off a good amount of light and one set of batteries lasts quite a long time.


You can see how at night the campsite had a nice warm glow using different kinds of battery operated lighting.


Our favorite restaurant was only about 10 minutes away from where we camped, so the only cooking we did during our trip was make s'mores over the campfire.  We toasted/roasted marshmallows until they were oooey and gooey, put them between two graham crackers and added a square of Hershey's chocolate in the middle, waited for it to melt together and then happily indulged.  YUM!!!


Saturday afternoon we met friends at their dock on the lake, barbecued, boated and knee boarded.  Well, I didn't actually knee board, but I did live vicariously through those that did... lol.


As we sped around the lake we slowed down to see a few of the amazing homes that surround the lake.  This little mountain cabin is available for $16,000,000.  Okay, so it's a major mansion... but 16 million... That is crazy!!!  But I do imagine it has an amazing view.


I have always thought this next place was incredibly awesome.  It has a boat house directly under the house.  So very cool!
  
Lake Arrowhead has a village that has lots of fun shops, restaurants, a grocery store and more.  When you have a boat on the lake, you can take your boat to the village and dock while you shop, eat, stroll around the village and visit their summer concerts.  That would be so much fun... You would never have to use your car.  Imagine, just hop in your boat and run your errands.


Sunday morning we packed up our car like a puzzle filling each and every hole...  Somehow we managed to squeeze everything back in!

We had a wonderful weekend and are looking forward to going Glamping again soon!


Would you go Glamping if it was like this?


Diana


Getting Organized in the Kitchen

Awhile back I did some organizing in my kitchen. I love the few changes I made and am planning to do some more soon.  My Tupperware cupboard solution (seen below) is one of my favorite improvements.  I had been super frustrated with my Tupperware and plastic containers cupboard.  It was just a couple of shelves crammed full of miscellaneous lids and containers... and every time I unloaded the dishwasher whatever I put into the cupboard managed to get shoved to the very back.    I researched online to see what I could find... I found a couple of brands that appealed to me.  Rev-A-Shelf  and ClosetMaid.  I ended up going with the Closetmaid because it was an inexpensive solution to my problem.  Since plasticware isn't heavy, these ClosetMaid wire basket pull outs were the perfect choice. They were super easy to install and they work really well. I'm loving having some organization to my island cabinets!


While I was looking at other options for organization, I found several other items that I am interested in eventually adding to my kitchen and pantry.  This can organizer looks like it would free up a ton of room on the shelves.  It's called the Cansolidator 40-Can Pantry Shelf Organizer (clever name!).  It is the can system shown below.  This is great for putting in a cupboard.  No more not seeing what is in the back of the cupboard (yipee)...  Also, I love that you put the food into the top slot and it comes out the bottom.  So it self rotates your food.  As long as you always use cans from the bottom, you are using the oldest dated can first.  Here are some great inspiration pictures of this system.

These make such great use of cupboard space (or lack of cupboard space, depending on the situation)...  and nothing gets buried in the back of the cabinet.  I so could have used these back in my small condo!


You can even use them in the refrigerator for sodas or beer.


 It's pretty cool that you can stack them and they connect side by side.  Also they can widths are adjustable (notice even the thin tuna can slot on the bottom).  I want these for my pantry!


Below are links via Amazon to the great organizational items that I mentioned above...  I love that I am able to find everything I am looking for on Amazon and it is so convenient!


Happy Organizing!

Diana

Relevant + Raw - My Daughters New Online Decor Shop

I'd like to introduce you all to my daughter, Britney. During the past year she has been exploring her creative side. She found that she has a love for working with wood. Two months ago she decided to quit her desk job and start her own business. RelevantRaw.com


Britney spent the past two months creating several beautiful home decor items, picking a custom color pallet, designing her website, photographing product and finalizing all of the little details. Her shop launch was last week (October 1st). Her first items have all been shipped and she is so excited! Below are a few photos of some of her creations that are my favorites. You can visit her shop to see more of her beauties //

Relevant + Raw offers fun air-plant holders in several shapes, different geometric shelves, a few styles of arrows, wood signs with hand caligraphy, and more...


She also has an ETSY store where she lists some of her items. Links to both shops are below...


I am so proud of her and all she has accomplished so far. As her mom it's been fun seeing her creative side develop and I can't wait to seeing her business grow. I hope you all will like her shop!


Blessings,
xo
Diana

Gone Glamping - A DIY Glamorous Camping Trip

This Glamping trip was so fun and we got so many great photos that I wanted to be sure to share plenty of them with you. So this is going to be a longer than normal post. I hope you enjoy looking around!

Earlier this summer we went camping in our local Southern California mountains. Only we didn't just want to go camping, we had a DIY Glamping weekend. If you aren't familiar with Glamping, it means literally glamorous camping. So rather than just sleeping in sleeping bags and having a lantern, we took it up several notches using fine linens, air beds, chandeliers, romantic lighting, candles, flowers and more. 


When we arrived at the campground we first spread everything out on the table to see what we were working with. Tents went up and then it was time to have some decorating fun. We did get a bit of a drizzle/sprinkling rain the first night so some items couldn't come out until morning. Luckily the rain didn't amount to much more than a light sprinkle and we ended up with gorgeous sunny weather all weekend. 


Our supportive hubbies and kids helped us set up the basics. Then it was up to myself and my partner in crime Jhen to do the rest.


We decided to deck out a EZ-up frame by using Ikea mesh curtain panels all the way around to add some romantic ambience to our site. A plastic folding table became a beautiful stage for an elegant dinner setting. Sadly we never actually ate at this table since we didn't have room to pack chairs, and we ended up eating out. There were plenty of restaurants in our area and after all when glamping, cooking just wasn't part of our equation. The only actual cooking we did was making s'mores :)

As we were assembling this tent area and then setting the table, many people stopped by to ask us if we were setting up for a wedding. Most were fascinated with the fact that we were Glamping (even men stopped by and thought it was cool).


  Our beautiful table once it had been set.  


The gauzy mesh fabric looked beautiful as it swayed in the breeze!


Here is the first glimpse of our tents. They are just basic camping tents, but we beautified up the insides. This campground has such a stunning backdrop it made for beauty all around us!


We put a chalkboard sign at the entrance of each tent with each tents name on it. Since the larger tent is a 8-10 person family tent that was used for just my hubby and I, we named it "The Walker Estate".


I used two Air Mattresses side by side to give this a king bed look. We like using two extra long twin mattresses side by side because that way when one of us rolls over it doesn't wake the other person up. Also, my husband likes his mattress firmer and I like mine softer. We are able to adjust the amount of air we put into each to give us each our preferred comfort. To add an extra touch of glam we each added a bed top serving tray.


How sweet is this petite chandelier. We used this same style chandy in both tents. The chandelier is lightweight (weighing less than three pounds) and I used battery operated candle lights in it for safety. The battery operated lights even have a remote control.


The smaller tent was named "Stark Bungalow". We managed to fit a chandelier in both tents proving that no space is too small to glam up!


The lightweight chandeliers were perfect for both of our tents. The battery operated candle lights gave off a perfect soft glow.


We used battery operated string lights and candles all over the site to add nighttime elegance to our space. In the above picture you can see some of the lights even though it wasn't nighttime yet.


Camping and Glamping both would not be complete without making s'mores. Below is our s'more tray which included gluten free graham crackers for those that needed them. The little metal framed chalkboard sign can be found here. We used a white paint pen to make the sign permanent. I also used chalkboard labels on the glass jars.


At night our entire camp was aglow. We had lights, chandeliers and candles everywhere. Most of the lights and candles were battery operated. Some of the string lights were solar powered which was really nice since they come on automatically at dusk and work as long as the sun shines during the day to charge them. Here in California that isn't a problem! I now have the white solar string lights in my back yard and they are wonderful. 


I didn't get a very good photo in the tents after dark, but this next photo gives you the idea of how the lighting felt at night.


We had a few other comforts like this USB solar power charger we used for charging our cell phones, Bluetooth speakers to play music and of course spare batteries for all of the battery powered lights and candles we had all over camp.

I was impressed that all of our battery operated items lasted all weekend and we didn't even need the extra batteries. But I was glad I was prepared!


During the day we had a chance to visit some friends at Lake Arrowhead and spend some time out on their boat. We had a beautiful tour of the lake and then enjoyed a barbecue on their dock.


The house he is pointing at is my favorite house on the lake. It has a double dock house underneath. You can pull a boat right inside your own boat garage.... Lake-house goals :)


This was our gang for the weekend. Thank you Jhen (From Here to Eternity) for all of your help and for taking photos with me. It was our first time collaborating together and we worked seamlessly together! Our weekend was a huge success and we had a amazing time!!


Happy Glamping!


Click here to see photos from our prior Glamping trip.


Blessings,
xo

Diana