Recently as I was browsing on Pinterest I was inspired to organize our garage. Most of the garage organization systems that are out there are pretty expensive. So I showed my hubby a few budget friendly ideas and the next day we were at the Home Depot buying parts to build our own garage organizer system. For the most part the pictures can speak for themselves. But I will note a few comments along the way.

Before getting organized we did park our cars in the garage, but it was a challenge opening the doors!

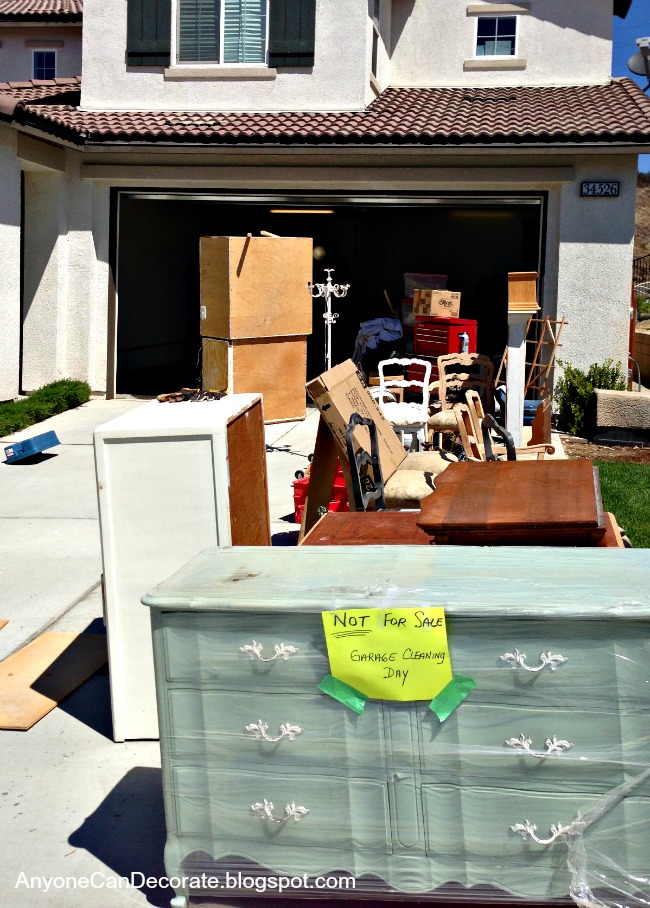
We started by gutting the left side of our garage... which ended up making the driveway look like a rather fun yard sale. I had to post a sign at the front that read "Not for Sale, Garage Cleaning Day".
If you are wondering how we get all of that in our garage plus our two cars... It's because our garage is extra deep.


Back by the water heater you can see our woodworking bench that my husband built. The chop saw is attached to it. Every time we cut a piece of wood in the garage the saw dust flies everywhere. As we cleaned out the garage, my hubby decided to put wheels on it so we could roll it out to the driveway from now on when anything needs to be cut. This will keep the garage much cleaner!

The addition of the wheels makes this so much more useful! Now our drill press is attached to the bench too.


Once the frame was built, Jim painted it and then started mounting shelves. I wanted wire shelving so dust would not sit on the shelves.

We added a section of peg board for miscellaneous small items.

A few smaller shelves and hooks hold gardening supplies and other items.

My favorite part of our organizer is these next shelves that we made from vinyl rain gutters. They are perfect for holding cans of spray paint, tubes of caulking and other small items. Love them!!!


Hanging our ladders and other items at the front of the garage freed up so much floor space!

We have allot of wood trim and molding that needs to be stored flat. It used to be on the floor (always in the way), now it is up out of the way on the shelves.

We can now park both of our cars in the garage and get out of our vehicles without stumbling and tripping on things. It is wonderful! I love being organized!!!

Diana
I just LOVE LOVE LOVE how it turned out!! Ted is jealous LOL.
ReplyDeleteI especially like the rain gutter idea as well as storing the baseboards/longer wood pieces across the top shelf until needed.
Brilliant!
Thanks Karey!!! ;)
DeleteLooks great but where'd all that furniture go? LOL
ReplyDeleteAll of the furniture is neatly stacked at the rear of the garage. We have an extra deep garage. It is a full 40' deep on the right side and about 35 deep on the left. When you look at the last picture that I have posted, the furniture is all organized in front of the vehicle. The open space in front of that vehicle is about 10' x 10'. The opposite side of the garage is my paint booth... Where we spray paint all of our DIY furniture projects. Having the extra deep garage makes a huge difference in our ability to have so much stuff! A standard garage is usually only 20' deep. I don't think we could function in a standard size garage!
DeleteI love it!!!!!!!!!!! Its just what I needed for my one car garage. Hope to do it this spring and hope it looks as good as yours. I was wondering if you used 1" x 2" for the frame and what length screws did you use to attach to wall? Thanks for the great idea.
ReplyDeleteWe use 2" x 2" for the frame (which don't really measure a full 2". They are more like 1 3/4 each way). We used 3" screws that allowed enough length to go through the wood and drywall and still anchor into the studs. Hope that helps!
DeleteBlessings,
Diana
I love this post and am so inspired by all your ideas! I can't wait to try the gutters for my own paint collection. I just shared this and a link to your blog over at NewlyWoodwards. Thanks again for the inspiration.
ReplyDeleteWhat a great idea to make a frame to attach the shelves/gutters to instead of just attaching to the walls. Wonderful job! Thanks.
ReplyDeleteHow did you attach the wire shelves to the top of the brackets?
ReplyDeleteWe just used zip ties so they wouldn't move around. They work great!
DeleteThe information you have posted is very useful. The sites you have referred was good. Thanks for sharing..
ReplyDeleteindustrial epoxy flooring Daytona Beach