

I made two different versions of the jars... Both Christmas tree snow globes and pine cone globes.

After I finished making the pine cone globes. I sat them on top of a pair of vintage Pottery Barn pedestal style tarnished silver candle holders. The jar lids sat on top of them perfectly. I love the way they look!

I thought I'd give you a quick tutorial on how to make these little beauties? It was so easy! I already had several vintage mason jars and jelly jars. I also purchased some new mason jars to be sure I had plenty on hand. At the Dollar Tree store I picked up four glass candlesticks for $1 each.
I went to Michaels Craft Store and purchased a large bag of bottle brush Christmas Trees (on sale of course!)... and also some iridescent glitter and a bag of fake snow.

I used Martha Stewart all purpose craft paint (works on wood, glass, metal, all surfaces), to paint all of the lids and the glass candlesticks that I planned to used as pedestals for some of the jars.
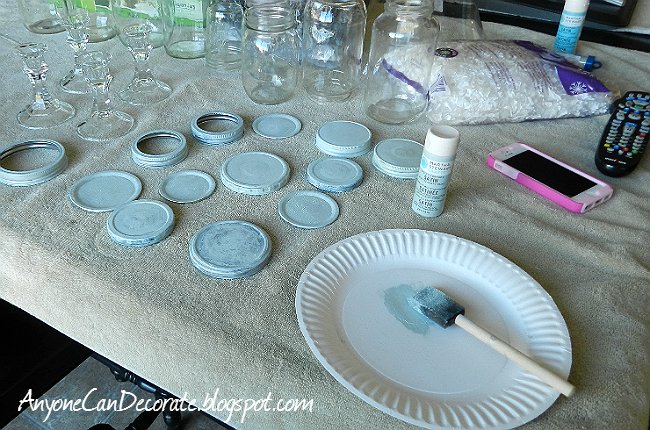
I painted a super soft aqua blue color for the first coat of paint, then I followed up a second coat with a pearl color. I wanted the bases to have an icy look to them.

After all of the lids and bases were painted and dry. I glued trees to the inside of the lids (leaving enough room to screw the lids back on their jar). Then I glued some of the lids to the pedestals I had painted. I used Gorilla glue since it is waterproof and super strong. (Note: You must follow gorilla glue instructions for use).
After the glue was dried I put about an inch of the faux snow (called Frosty Snow) and sprinkled a bit of glitter into each of the jars. Then I screwed them onto each of their lids.

If you are wondering, these are water-less snow globes. They are not the kind you shake and watch the glitter snow fall. These are pretty much just for looks... and I love the way they look! They look like ornaments on display and the glass shows them off beautifully!


I was trying to decide which was my favorite, but I really do like both styles so much I can't decide! How about you, do you have a favorite?
I'd love to hear from you!
Blessings,
Diana
Sharing this post at:
Savvy Southern Style, The Brambleberry Cottage
I love those! I have a show coming up and needed ideas for Christmas-y things to sell. Thanks for sharing!
ReplyDeleteLove these! Have a ton of mason jars in need of sprucing-this is perfect! Kelly @ The Happy Nest Project
ReplyDeleteOmgoodness, I absolutely love these! Thanks for sharing!
ReplyDeleteI am working right now on my DIY mason project ...and still confusing if I am going to take a Christmas theme or fall theme.
ReplyDeleteLove, love this project!!!! They are beautiful! Thank you for the inspiration! I may have to copy these!!! :)
ReplyDeleteLoving these, but especially the pine cones. That little bit of snow on the tips of the (what? petals?) are beautiful!
ReplyDeleteIt is 2014. I still love making these. I do turn mine over and watch my faux snow fall. I kept one out as a reminder to pray for rain in the mountains where these kinds of trees grow!! And it did snow when I'd remember to pray. ☺️I liked your idea of icy blue paint covered with pearl to give a cold look. And the use of candlesticks too. I have several with a broad base. The tips may seem old but they are fresh and new to us today!
ReplyDelete