Table Makeover - Before & After

I've had this little round table for quite a few years.  It was the last piece of totally ugly golden oak furniture in our house.  It's from about the 80's when pretty much everything we owned was golden oak (yuck, what was I thinking?)... No offense if you like that look.. But it is so not me!!!  I decided it was definitely time to give this baby a much needed makeover!  I just wish I could give myself a makeover as easily :)  lol...

This is what the table looked like as I gave it a little light sanding to smooth out the damaged surface and to help the paint stick.


After a light sanding I wiped the dust off with a shop rag and then put up on my make shift work table to spray a coat of primer.  I like to use Rustoleum spray primer...  It works on pretty much everything, even plastic.


One coat of primer and it was looking pretty.  I even considered keeping it white at this point...


But since it was going into my stairwell, which is also white, I decided to go with the color Espresso which matches my stair rail.


Here the cute little table is all finished in the base of our stairwell... Notice how the color of the table compliments the stair railing.  I know I still need to paint the walls and get a mirror or a couple of accessories on the wall, but I wanted to finish the table first before I started looking for what else to hang there.


Table makeover cost $8.  One can of primer and one can of paint.  The table is totally refreshed and like new again!  


I don't necessarily love all of the accessories as they currently are on the table (I need to find some better hydrangeas), but for now (until I find something better) they will do.  I found the adorable little shabby chic style lamp at Kirklands a few weekends ago.  It was only $15... I love me a good bargain!!!  


Until next time,
Happy decorating!


Camping in Vintage Chic Style

Have you ever wanted a motor home or a travel trailer but can't afford one?  I admit I usually like the brand new one's that I can't possibly ever afford!  But, what about getting an older inexpensive one and giving it a complete face lift makeover?

The other day as I was helping my in laws post their motor-home on Craigslist, I started wondering what it would be like to give an RV or travel trailer a complete makeover... How much fun it would be to redo one in a completely soft cottage romantic shabby chic style?  Could you actually take an old and ugly RV and make it beautiful with a little paint, fabric and some cute decorative accessories?  Then I searched the internet to see what I could find.  I found out that there is a huge following for vintage retro type motor homes and RV trailers.    

I came across several RV makeovers that I do like that, but this is definitely my favorite.  It came from a site called  Home Sweet Motorhome (which is a German Blog).


I love it!  So charming... so chic... so cute.... and absolutely so frigen adorable!!!


The bathroom mirror is so much better than that you would normally find in an RV!


Such a cozy spot to curl up and read a good book or have a romantic meal... I'm lovin the candle chandelier overhead!


I love that there is a curtain to close off the drivers cabin..  The curtain being white like the walls makes it almost disappear when it is closed.


OMG... How adorable is this upper bunk kids space?  Any child would feel so welcome up there!  Then notice there is even a small flat-screen television below that cute blue light sconce.


Notice this is the same space where the u-shape table booth was... With the table lowered it makes an adult bedroom space.  Even though the space is small in the RV, the charm of the decor is HUGE!


The use of vintage linens, soft fabrics and quilts makes this space super cozy and inviting!


Lovin the cute bulletin board with fabric pouches on the outside of the Water Closet... Notice the cute WC on the bathroom door.


A cozy cottage on wheels... What a great way to travel!!!  


So much adorable cuteness in this small space... Every corner has something new... Great ideas went into creating this sweet home on wheels!


They even put their blog site title on the outside of the motor home...


Here is the amazing part... check out these few pictures of the RV before it's makeover... It was pretty ugly in it's before stage!


 During the makeover... 


It's amazing what white paint can do to clean a space up!!!  Well, paint and hard work of course.  


I love the before and after!  Stunning transformation! 


What a fun project :)  It really does makes me want my own!!!

Home Made DIY Paint Booth

CHECK THIS OUT...  My amazing husband built me a paint booth in our garage.  We are so blessed to have a garage that is 40 feet deep (thank you Lord)!!!  It allows us a to have a workshop, a paint booth, storage for all of our junk (my husband probably says it's all my junk), (I call all of it - my treasures), and we still have parking for both of our cars. 


I love to DIY paint old furniture and spruce up vintage home decor accessories!  Paint is a great way to give new life to old pieces.  I used to paint furniture by hand with just a brush and or roller, which takes forever!  For smaller items I would use a can of spray paint in our back yard (where often half of the paint would spray into the wind and then dust and bugs would fly into the paint) and make for a less than professional paint job.  


After getting this great idea from my dads workshop, my husband (did I mention he is amazing?) built me this awesome paint booth in our garage.  He used thick painters plastic for the walls, wood strips to fasten the plastic to the ceiling across the top and also wood strips stapled at the bottom of each side to weight it down... Then duct tape to reinforce the edges... Velcro added down the sides on the duct tape to seam the edges together for when the booth is in use... then the Velcro easily pulls apart for easy entrance and exit... We put a large canvas painters tarp on the floor (to protect it from our mess).  When the booth is not in use the sides can actually be rolled up and tied to the ceiling to get it out of the way (so cool)... However, being that I paint often and I have several items awaiting paint, I doubt it will be rolled up much if ever :)    

In this next picture you can see how well the Velcro holds the corners together (keeps the paint over-spray from getting all over the place).


The paint booth measures 10 feet wide by 10 feet across and also has a 10 foot high ceiling.  The area has good overhead lighting which makes the space great for painting any time day or night. (Oh great, so now in the middle of the night, when insomnia kicks in and I can't sleep I can just get up and paint... lol).


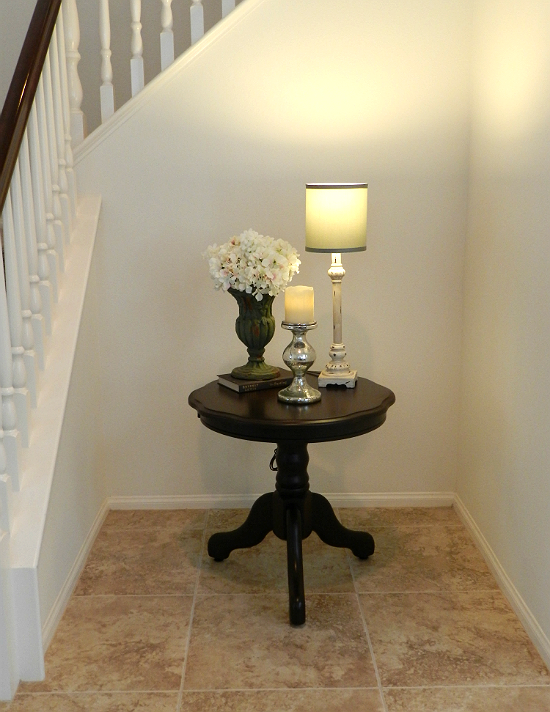
Today I painted my first piece in the booth.  It is this old small oak round table (which was ugly golden oak like from the 80's) that I've had for several years.  I sprayed it with a $3 can of primer and soon it will be spray painted a color :)  It already looks so much better!  I must say that spray painting without a breeze blowing my paint away made it so so so so much easier than in the past in the back yard!!! 


The paint booth is built around the side door of the garage which is great  because when the weather is nice (which is almost always as we live in Southern California) I can open the door for some fresh air (ventilation of the paint fumes).


Even with the paint booth we still have a 10' x 10' shop area at the rear area of the garage (shown in the next picture).  It is a great space with a large window.  Notice that it is currently filled with furniture just waiting for me to get working on it.  My flea market, thrift store and garage sale finds and treasures tend to encroach into the walkway a bit, but I try to keep it clear :)  


Those two chunky turned leg end tables you see on the right were recently found at a flea market for only $10 each.  I love me a good find!  The paint and finish on them is absolutely horrible, so they will be stripped and then refinished (hopefully soon) but I have so many projects going on, I don't necessarily follow an order, I just work on whatever inspires me on any given day...  I probably shouldn't admit that, but it's true.  I am not very organized when it comes to planning my projects out... I just do what I feel like doing and then ignore the others until I get inspired or have the energy ;)  

I have millions of ideas for projects that I want to do.  I just wish I had more of me to go around so I could actually get them all done. Do any of you have that same issue?  

Little by little, eventually they will all get done.  I just try to take them one at a time, so I don't get overwhelmed!  And I always remember to take time to stop and smell the roses in between.  This paint booth along with the new paint spray gun we are getting will definitely make my painting projects easier.  I can't wait to get many of these pieces done and finally into our home (I still have a bunch of empty spots around here to fill).  I will document and share each project with you as they are completed.

Link parties I'm attending: 
Days of Chalk and Chocolate

Blessings...
and Happy decorating!

Exciting Thrift Store Find

I found it!!!  I have been looking for over a year for a bench or chest to place at the foot of our bed... and I pretty much needed it to be inexpensive!  I am on a budget and that budget allows for about $50 per week for my projects.  I saw several high end pieces that I liked that I couldn't afford (from Pottery Barn and Restoration Hardware).  But for me it has to be flea market, thrift store, Craigslist or a garage sale and I just couldn't seem to find anything I liked.  I didn't want to settle on something that was just okay, but I wanted to ultimately love my piece.  I think we should love all of the things in our home.  Or they should at least have the potential to be fixed and then "LOVE".


A couple of days ago I popped into a thrift store that I check out every few weeks and I found this... mid century coffee table like bench thingy...  Sure it is a little strange looking with the removable marble side lids... but it has so much potential!!!  Can you see it?  All that potential???  It is the perfect height and width to be a bench.  We have a large master bedroom and a king size bed, so I wanted the piece to be somewhat substantial... and this piece is.  The craftsmanship on this beauty is unbelievable.  Super solid and study with dovetail construction... and those cute little metal/brass feet things.  I just knew it was a quality piece, but I didn't like pick it up and look all under it for markings.  Oh, I thought about it, but it was too heavy!  I basically had no idea who manufactured it, but I didn't care... I wanted it... and for the price they were asking, it was definitely going home with me!  Get this, it was only $25.  And they don't charge sales tax at thrift stores... Bonus!  


So I paid for it and then called my hubby to stop by on his way home with the SUV to pick it up.  Whew... it fit, if it was any longer I'd have been in trouble.  The top of it is a bit scratched up, but it's nothing a little sandpaper and paint won't take care of :)  I for sure will be painting the top (center) an off white (to match the marble) and likely I will be painting the entire thing.  I just have to decide exactly what color to paint it or if it should all be off white and then a little distressed, maybe some glazing.  Possibly make a cushion for the top.  What do you think???


I know some people will say, "don't paint wood"... But me, I love me some painted furniture (forgive the grammar, or lack of it)!  I do like some wood around the house, but give me a can of paint, and I'm a happy camper... or a happy painter (hehe, okay I was trying to be funny, but I don't think my attempt worked).


Anyways, today while searching Craigslist and I came across this posting (below).  This piece is listed as a Drexel  mid century piece and is listed for $195.  It is a little taller and not as wide as mine, but it is definitely the same construction and same manufacturer.  So now I know who made my beauty (Drexel) and I know I got it for a steal!  Yes, an absolute steal at $25, which, keep in mind is only half my budget for the week.  Woohoo, Yeah me (insert happy dance here).


So now I just have to figure out what to do to it, how to finish it.  If you have any suggestions or ideas on how I should paint my bench, I'd love to hear!!!  Maybe all off white... or two tone... or a glaze over the off white to show off the details??  Hmmm... decisions decisions... Please advise :)


Oh well, now I am off to Lowe's to buy some paint for our very white entryway.  I'm bored with white and my amazing wonderful hubby is off work tomorrow so I am going to take advantage of it, of him... you know what I mean :)


Happy decorating!

A Little Bit of Sunshine - Decorating with Yellow

It's raining here today here in Southern California and I myself am  ready for some sunshine!!!  So here we go... Decorating with Yellow - Bring the sunshine inside :)

This past week while I was out shopping I saw that yellow is making a huge come back in home decor.  I saw tons of citron yellow (super bright yellow) and I wasn't sure if I could embrace it, but after looking around at some ideas for decorating with yellow, I'm coming around to actually liking it quite a bit.  Below are some of my favorite examples of what a little yellow can do.  

Yellow definitely gives a pop of wow on this interior sliding barn door that separates a master bedroom and bath.

 (via: Southern Living)

I love the contrast of the yellow against the dark grey walls and white moldings.

 (via Inspiration For Home)

The style in this next picture is too modern and much too contemporary for me, but it does show that just a little punch of yellow goes a long long way!


Yellow also looks great with black!  Having some white and neutral accents mixed in helps the space to not look too much like a bumble bee...

 (via: Country Living)

  (via: Country Living)

This next room, from Sew Dang Cute... really is so dang cute :)  I'm loving the dark grey and white stripes on the walls, and yellow used just in the accents.


After seeing so many different shades of yellow done with greys, browns and black as contrasts, this whole decorating with yellow thing is growing on me quite a bit.  I still wouldn't paint a whole room yellow.  But pops of yellowy sunshine throughout the room can be quite pretty.  


I find that I am liking yellows that are a little more subtle like the color on this next cabinet...  It's definitely still yellow, but not as intense as some of the others above.

(via Country Living)

I really like this chair from Anthropologie :)  The print gives it a touch of whimsy and it's just the right shade of yellow... I even have a spot for it in my house... Now, I just need to with the Lottery (hehe)...


I hope all this yellow brings you a little bit of sunshine..


Happy St. Patricks Day...
and happy decorating!